
Installation Guide
Auto Brand Plate Installation
INSTALLATION GUIDE FOR USA SIZE (6″ X 12″) FRONT LICENSE PLATES
Please check to see if your vehicle is equipped with a license plate bracket or has a cavity to install your license plate.
Tools needed:
1 – Screwdriver – Phillips Tip
1 – Screwdriver – Flat Tip

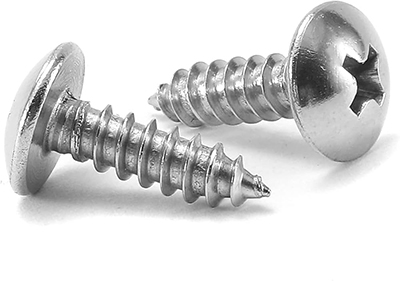
Mounting Assembly Included:
4 – Color coded screw head hider caps (A)
4 – Plastic Washers – clear color (B)
2 – Phillips Head Screws (C)
2 – Slotted Head Screws (D)
2 – Hexagon Nuts (E)
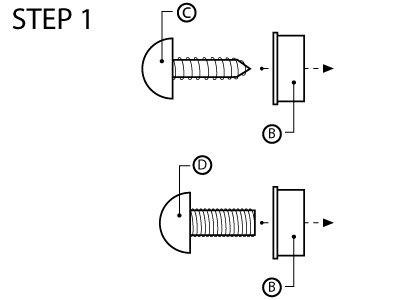
Step 1
Insert Plastic Washers (B) into screws (C) and (D)
Step 2
Check to see if the screw holes on your vehicle are at the top or bottom of plate.
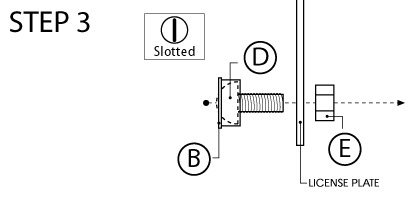
Step 3
If the screw holes on your vehicle’s license plate holder or cavity correspond to the top of license plate, then insert the two slotted head screws (D) into the bottom two holes of your license plate and hold these in place with the Hexagon Nuts (E).
Reverse this procedure if the screw holes on your vehicle’s license plate holder or cavity correspond to the bottom of the license plate.
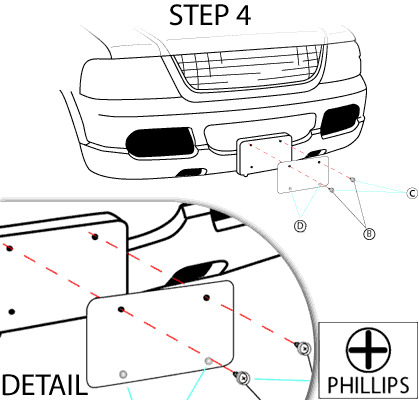
Step 4
Mount license plate to vehicle using two Phillips head screws (C) with plastic washers (B). Please do not over torque or over tighten.
Step 5
Insert color coded screw caps (A) over plastic washers (B) for a uniform look.


sign-up to receive